This guide is for the 2600 Jr PAL model with a Rev F mainboard – if you have a different model 2600, this guide may vary. Please compare the photos below to your board. Check the 2600 mod guide main page for other models that I have guides available for!
Step 1 – open the case
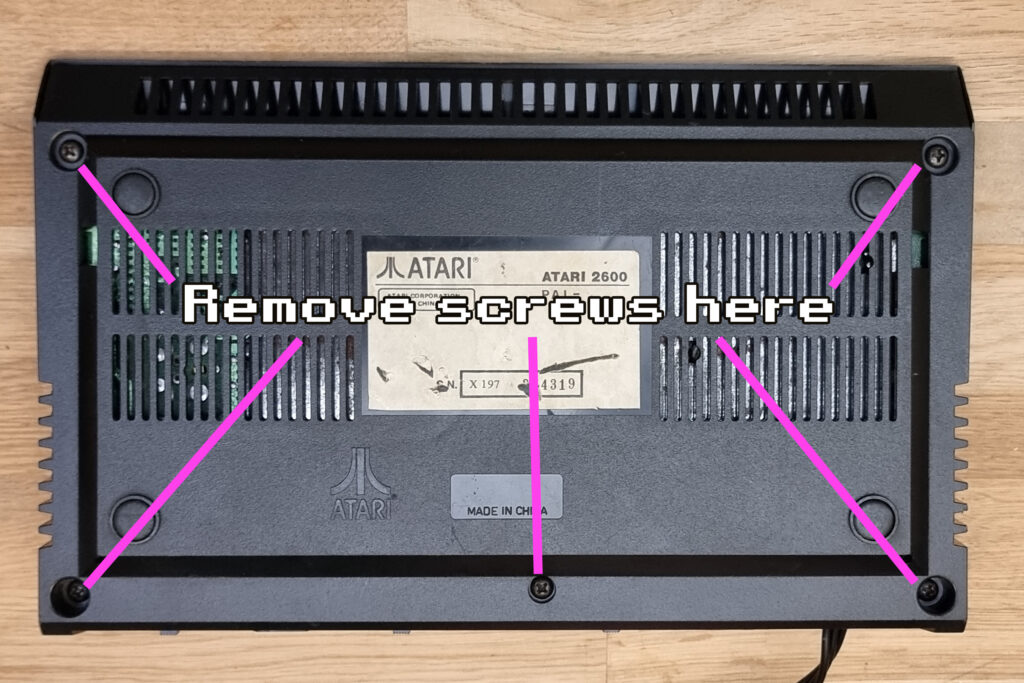
First step is, quite obviously, remove the mainboard from your 2600. There are five screws on the bottom of the case and the top should just lift off.
Step 2 – free RF shielding
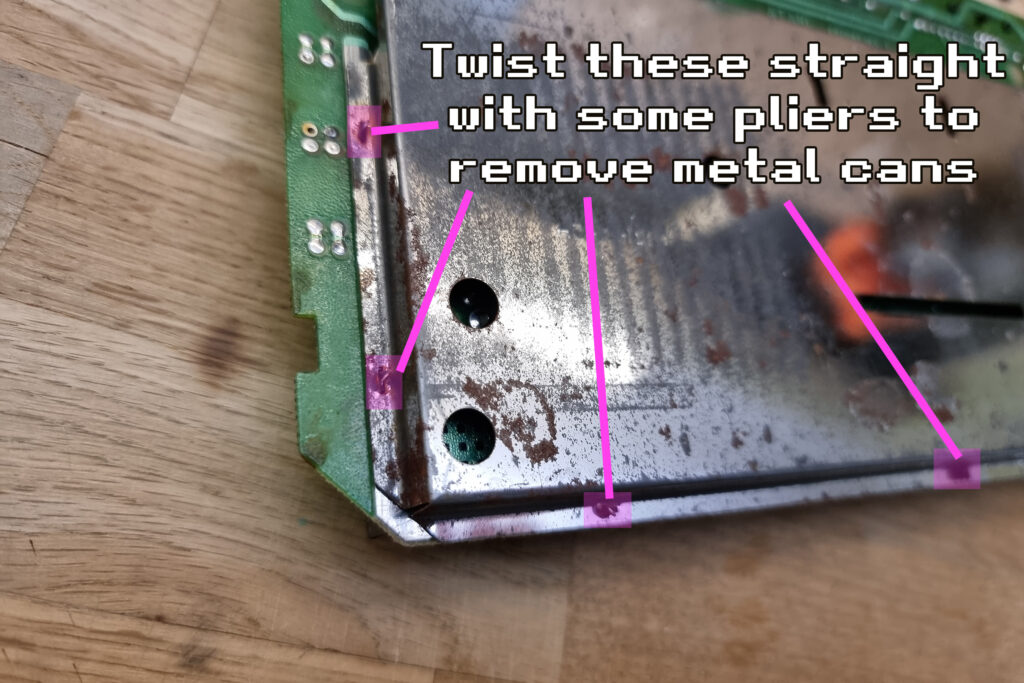
Once you have the board out, you will need to remove the metal RF shielding on both the front and back sides of the board. There are little metal tabs on the back side that you will need to twist straight in order to get them apart.
Step 3 – remove old components
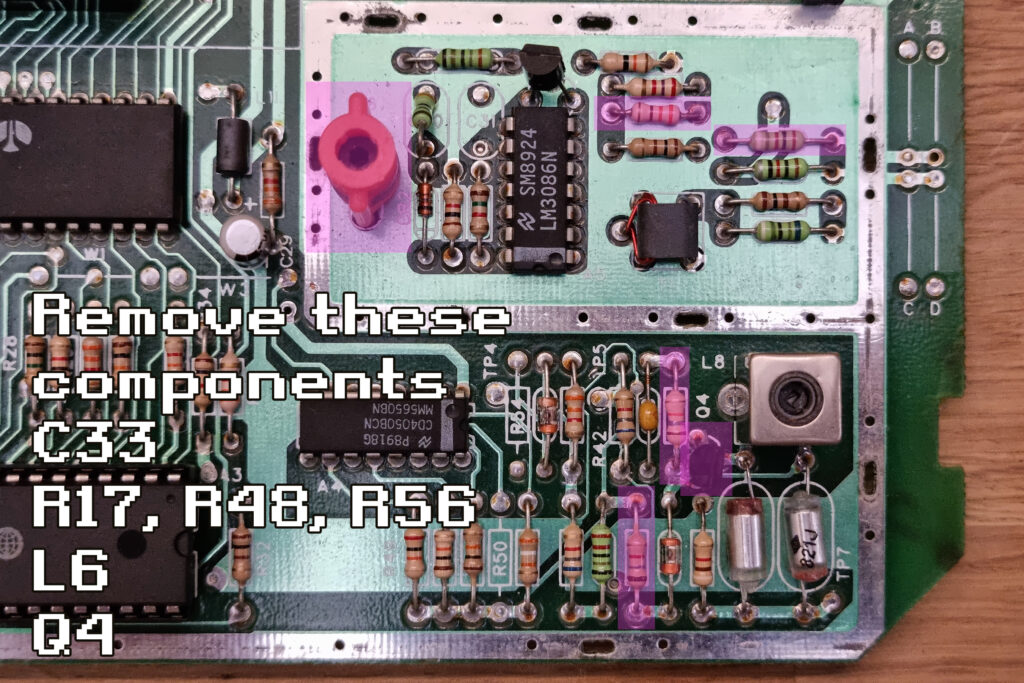
Now that the board is free, it’s time to remove a few components. There are six components in total that we need to remove – capacitor C33, resistors R17, R48, and R56, inductor L6, and transistor Q4. Desolder however you like! If you’re not too confident with your desoldering skills, just clip the leads as close to the board as you can and remove.
Step 4 – remove RF connector (optional)
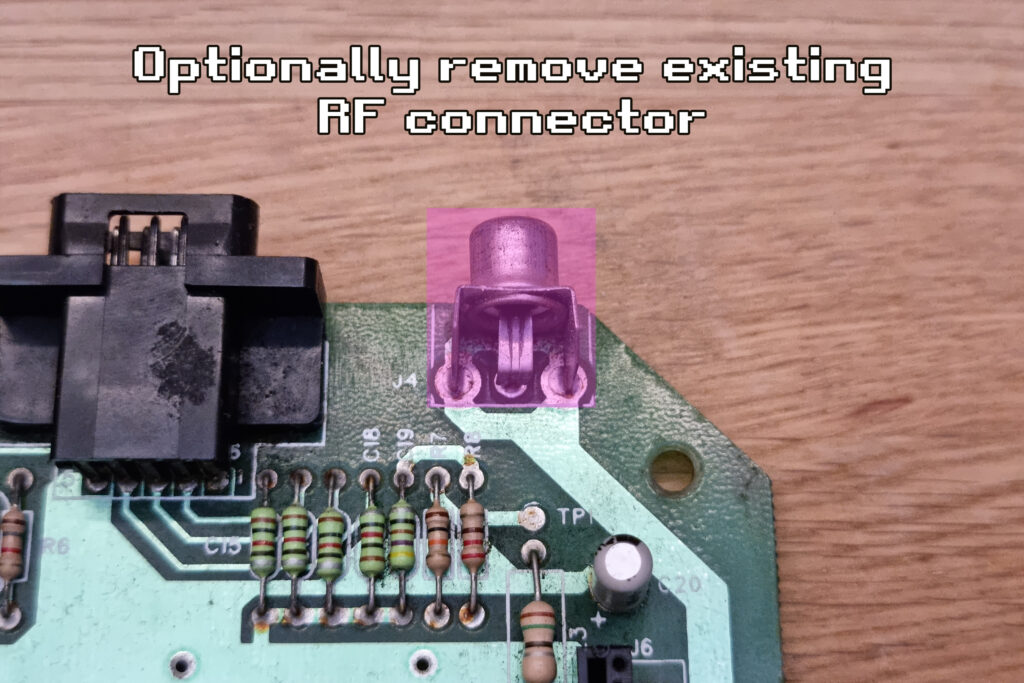
Here you can optionally remove the existing RF connector, as it will no longer function after this mod is complete anyway, and you can use the existing hole it frees up to route the cable out.
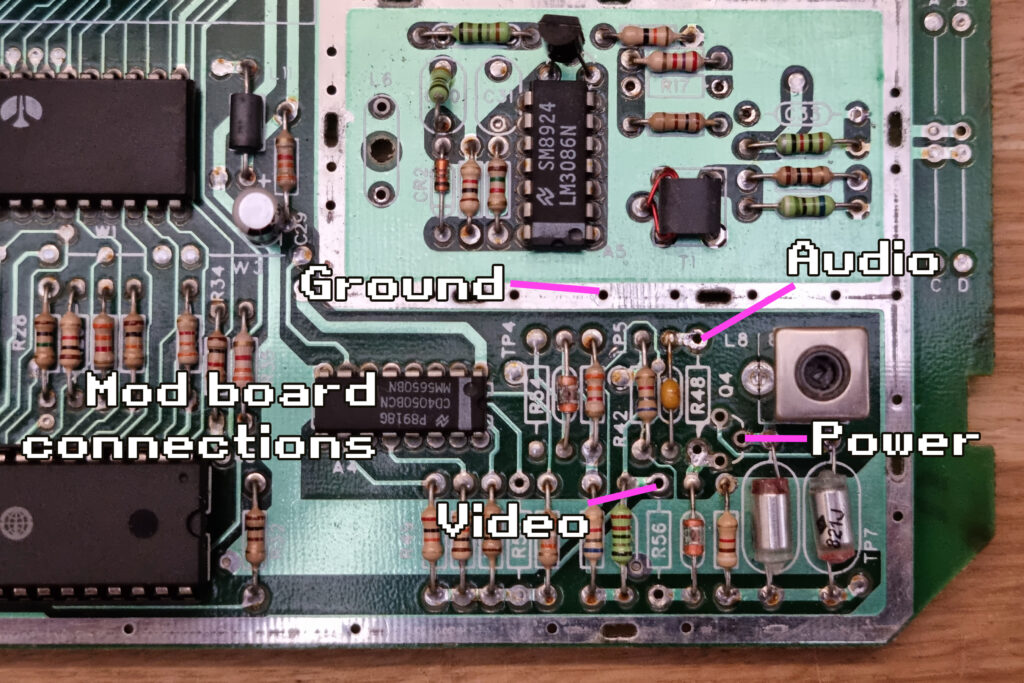
Step 5a – connect mod board (front)
Now it’s time to get your mod board wires and connect them to the points marked on the board – audio, video, power, and ground. Note here that ground is any part of the silver trace going all around the board, just pick a spot and connect to it.
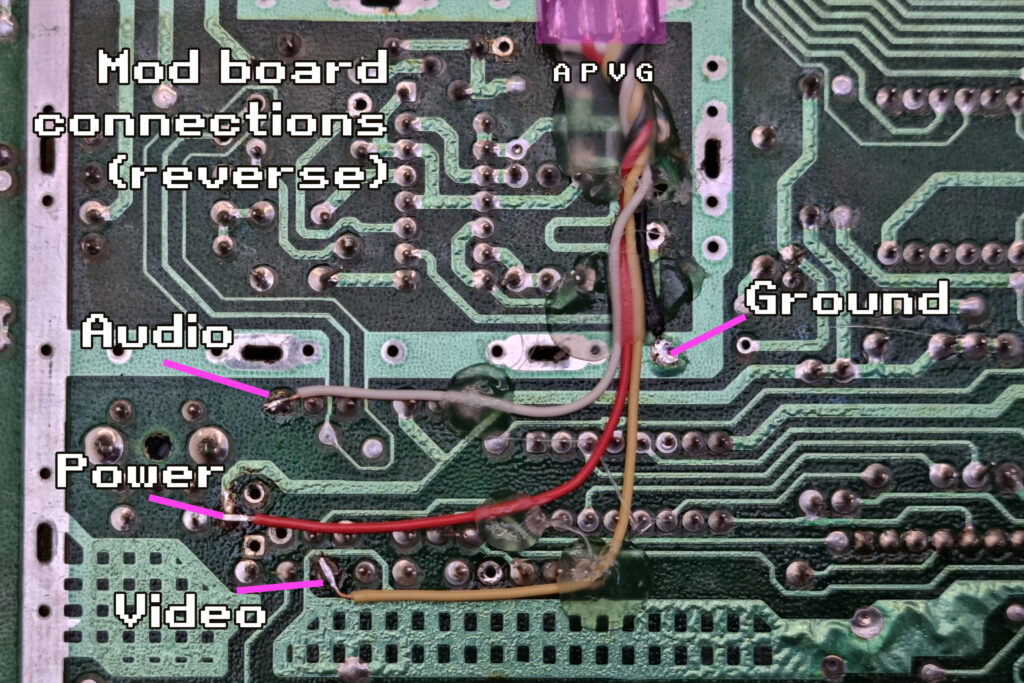
Step 5b – connect mod board (back)
I personally prefer to install this mod on the rear of the board, so here’s the same points on the back. Note that on the rear of the board, the ground connection is going to a point that connects to the silver border on the front side.
Step 6 – secure it
Once your wires are in place, you can now go ahead and mount the mod board in a secure manner. I use a good amount of hot glue and a cable tie. You will need to ensure the cable for the mod board can escape the metal can once it’s placed back on – oddly enough, Atari left a perfectly sized gap as shown here.
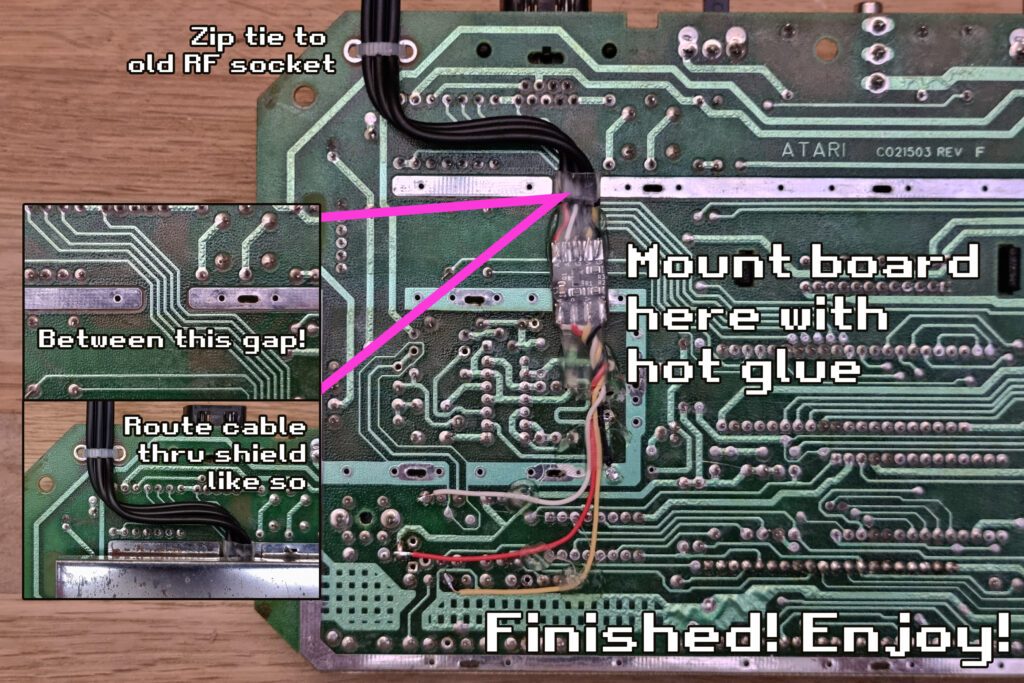
All done!
Enjoy your new-old Atari 2600 connected via composite to your new/old TV!