This guide is for the 2600 “Vader” 4-switch PAL model – if you have a different model 2600, this guide may vary. Please compare the photos below to your board. Check the 2600 mod guide main page for other models that I have guides available for!
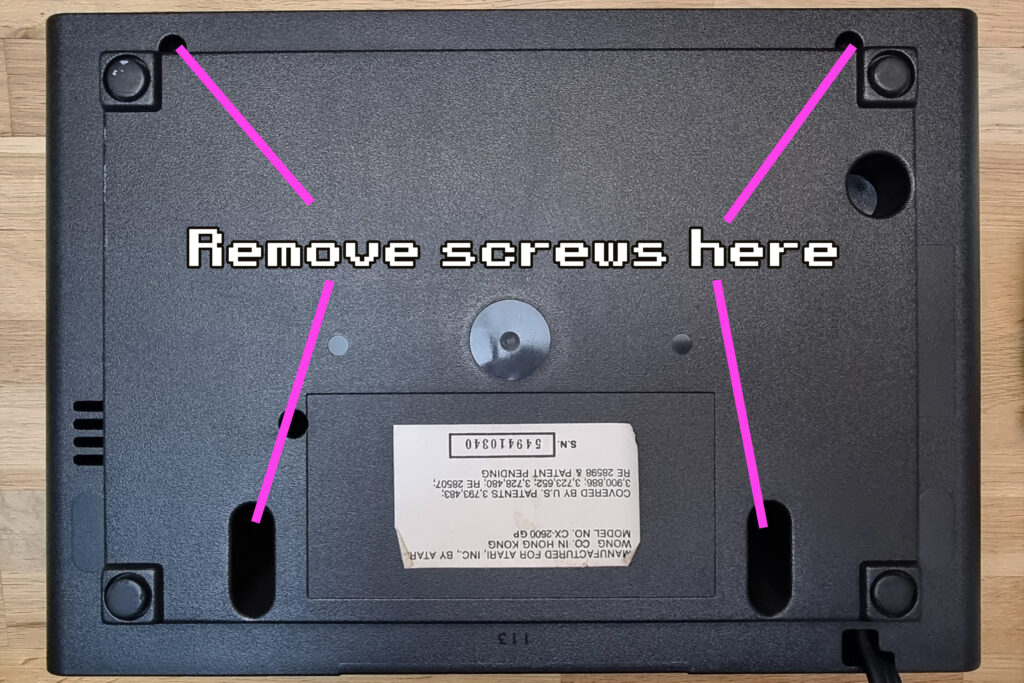
Step 1 – crack ‘er open
First step is, quite obviously, remove the mainboard from your 2600. There are four screws on the bottom of the case and the top should just lift off.
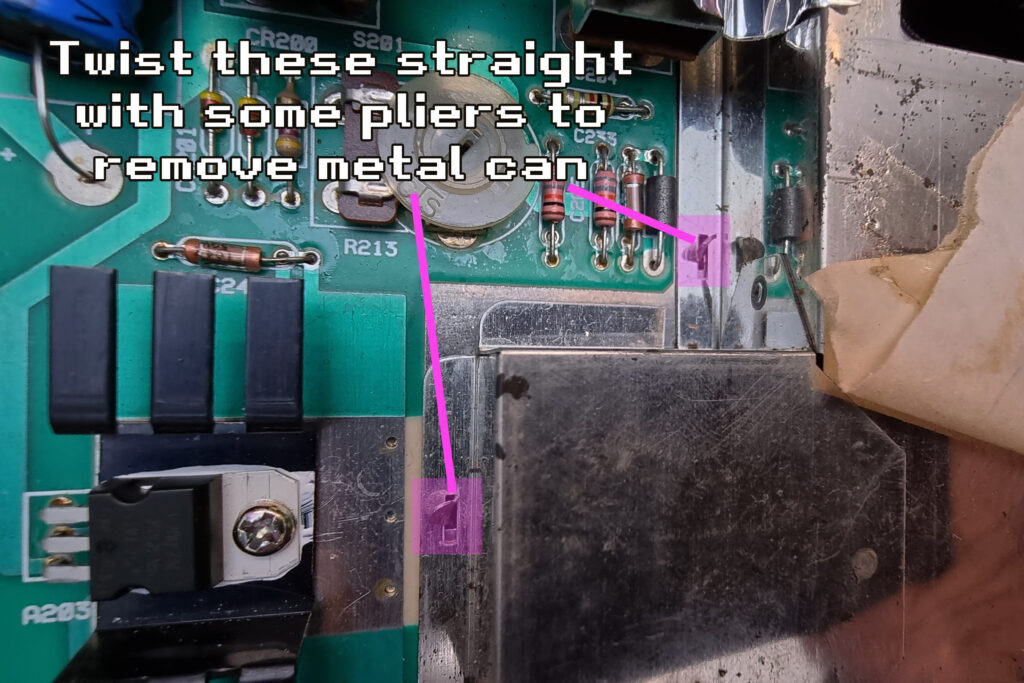
Step 2 – remove RF shielding
Once you have the board out, you will need to remove the shield can by twisting the metal tabs and lifting it off. There are five tabs all around. Just use a pair of pliers and twist them straight and gently.
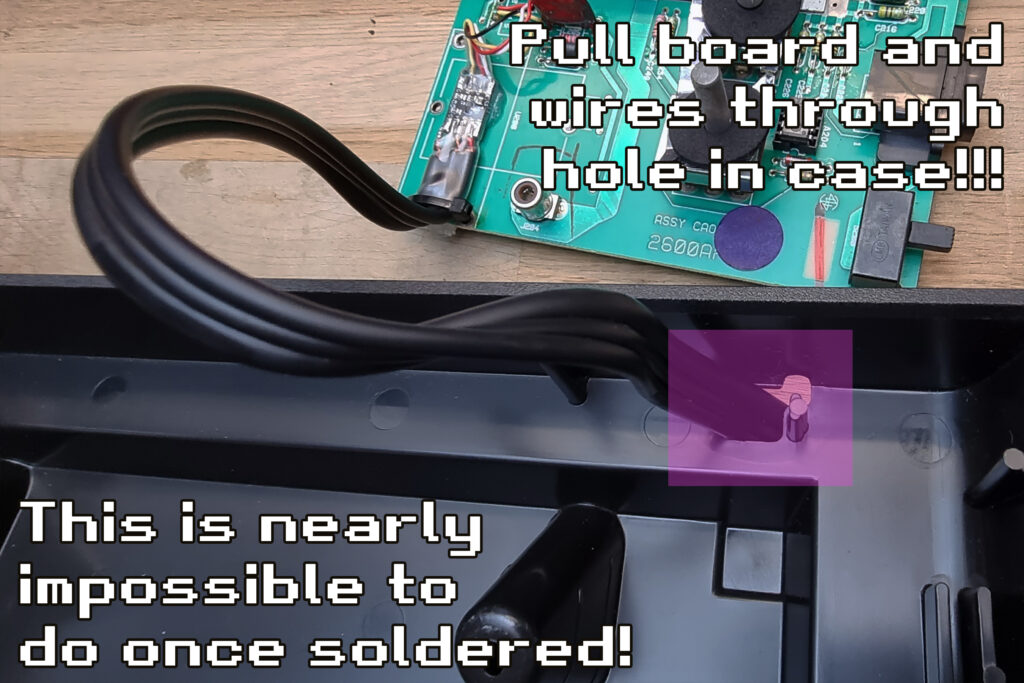
Step 3 – route wires
Once you’ve lifted off the can, now’s a good time to thread the mod board and attached composite cable through the hole in the case. If you don’t do this now, you will have trouble doing it later (probably have to desolder and start again)
Note that this only really applies if you’re using our handy dandy pre-soldered mod board that comes included with all the wires you need and a 1.5m composite stereo output lead. </shameless plug>
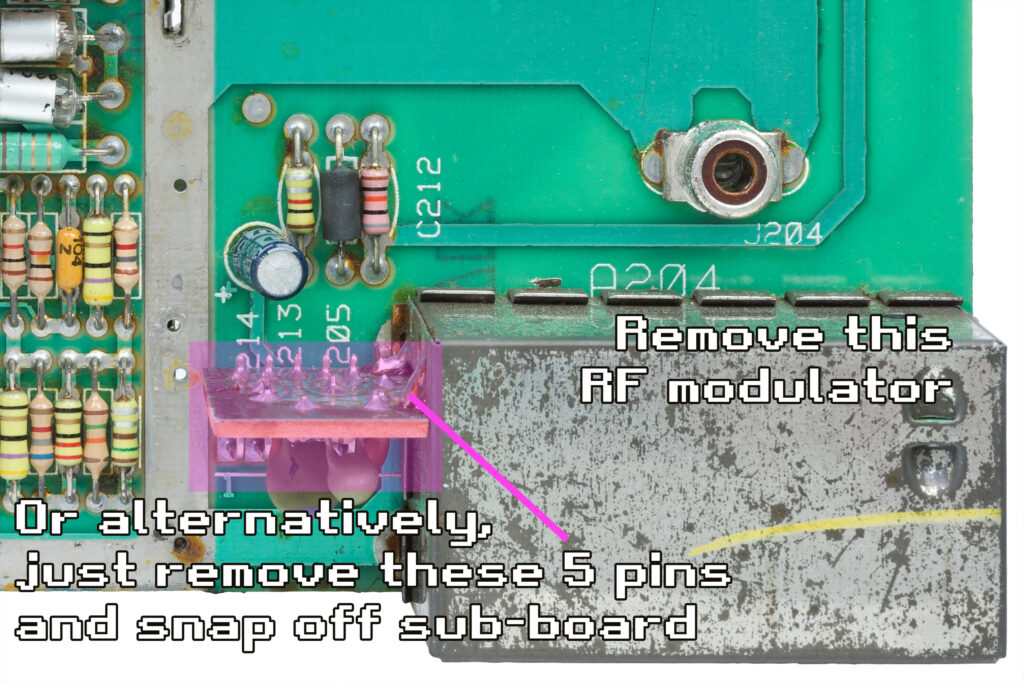
Step 4 – remove old modulator
Next up you will want to remove a few components. Warm up your soldering iron – we’re going in!
Here you *may* need to remove the existing RF modulator on the board. It’s the big box in the bottom right of the board. You will only need to remove it if it has a separate piece of board that hangs out to the left and connects to the main board with five pins. Either desolder and remove the whole unit, or just desolder the five pins and snap off the little PCB.
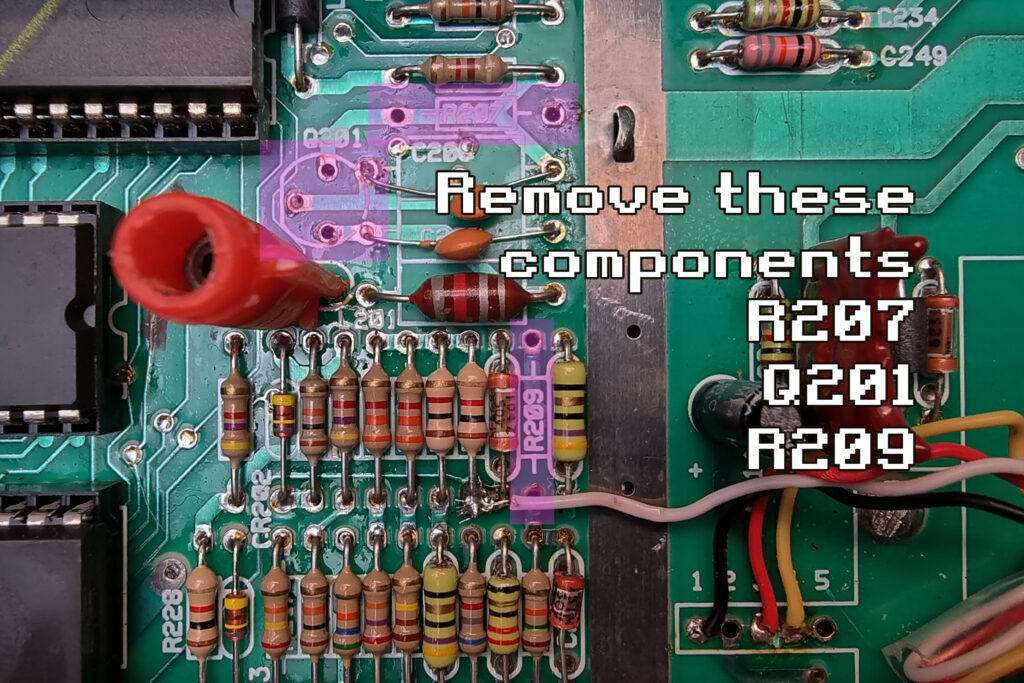
Step 5 – remove old components
Then you will need to remove two resistors, and one transistor – R207, R209, and Q201. You can desolder them however you like. If you’re not too confident, just snip the leads off and remove them.
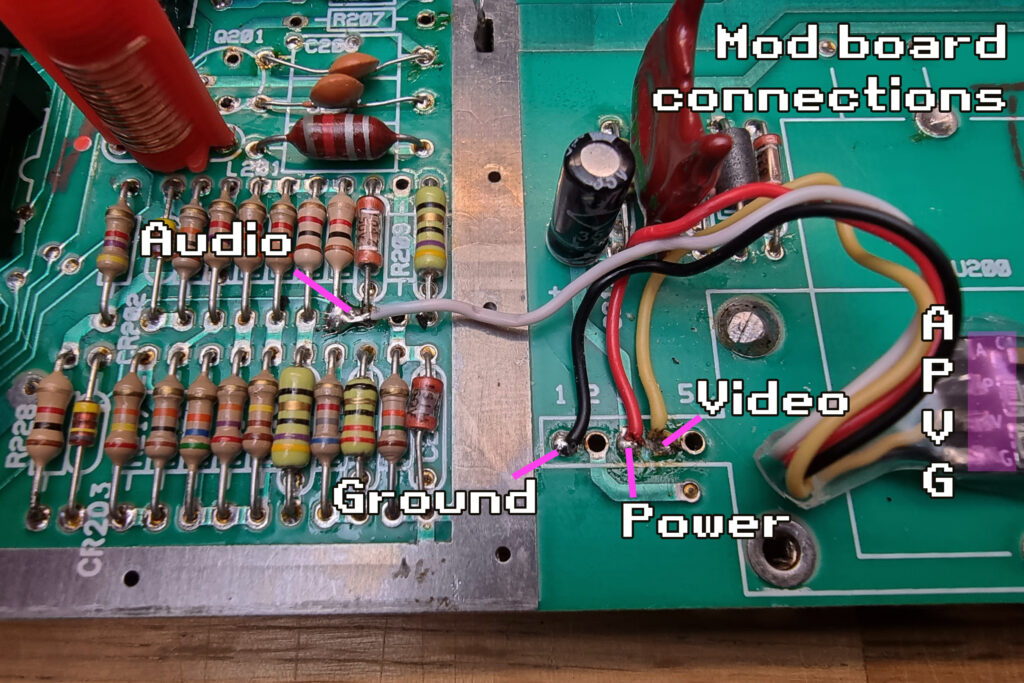
Step 6 – wire up mod
Once that’s gone, start connecting the wires from the mod board to these four points on the mainboard – audio, video, power and ground.
Note that the audio wire can be soldered to either of the legs on the two components here, or in the middle of both like I have them in this photo.
Step 6 – secure it
Once the four wires are connected up, all you need to do now is secure the mod board in place somehow. I used hot glue and a cable tie.
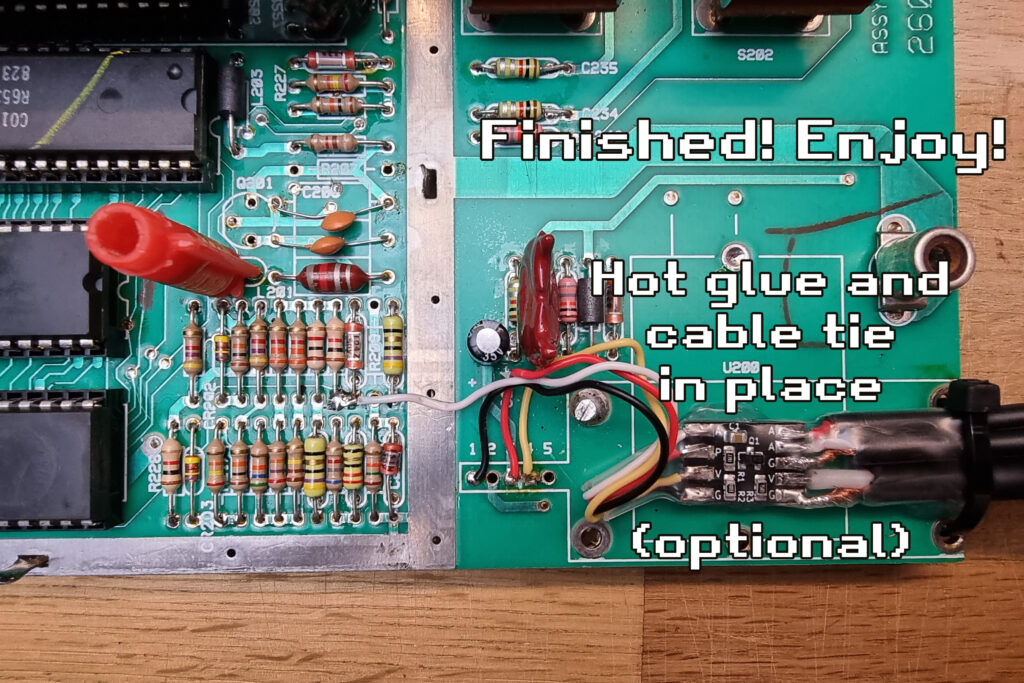
All done!
Enjoy your new-old Atari 2600 connected via composite to your new/old TV!