Do you have a wonderful Nintendo 64 console that’s in need of having its capacitors replaced? Do you have one that doesn’t need it but you want to do it anyway? Did you pick up a Nintendo 64 Recap Kit from our store, or did you grab one from somewhere else? Or do you just have the right capacitors to do it?
If you answered yes to at least two of these (dealer’s choice), well have we got the guide for you!
The Nintendo 64 is such a classic console, and one very close to our heart, so we love keeping them alive and ready for use. Although the N64 doesn’t typically suffer from the well known capacitor plague of consoles and computers of the 80s and 90s, one of the easiest ways to ensure they keep drawing triangles is to preventatively change the caps anyway.
The N64 is one of the first home consoles to use entirely SMD capacitors on the main system board, so while it does require some slightly more advanced techniques for replacement, thankfully it is one of the easiest to disassemble.
Tools
To do disassemble the console and perform the recap, you will need the following:
- Large Phillips head screwdriver (regular house size, PH 2)
- Small Phillips head screwdriver (fine tip size, PZ 1)
- Gamebit 4.5mm screwdriver (we recommend the IFIXIT Pro Tech Toolkit)
- Soldering iron
- Fresh solder, preferable 63/37 (we do not recommend lead-free)
- Flux
- Wire cutters (“snips”)
- A lot of patience
Disassembly
Open sesame
Firstly, fetch your console from under the TV, unplug all the leads and bring it to your bench. Make sure you’re nice and comfortable. Roll your shoulders. Left. Then right. Left. Then right. Good.
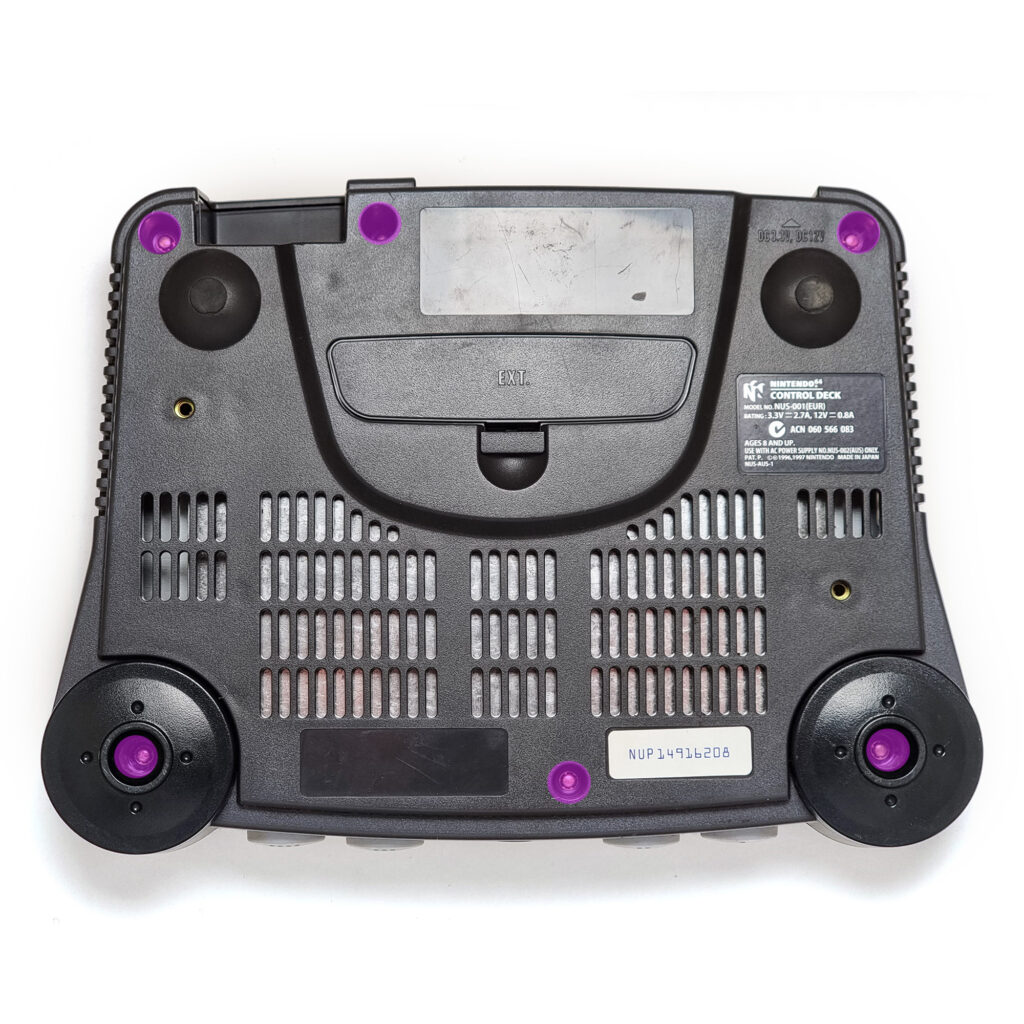
To start with, open the expansion port cover and remove either the expansion pak, or the jumper pak. Next, flip the console over and locate the six screws on the bottom. These are 4.5mm Gamebit security scerws, so use that driver and remove them all. They’re all the same, so you don’t need to take notice of where they all go.
Once you have those screws removed, flip the console over and you should now be able to lift the top half of the plastic straight off.
Heat spreader
You’ll now be greeted with quite a large heat spreader, that is the first thing to go. Find these 14 screws and remove them. From top to bottom in the picture below, there are 12 identical ones, then two with washers and two black ones, so keep note of where they came from. Use the large Phillips head screwdriver for all these.
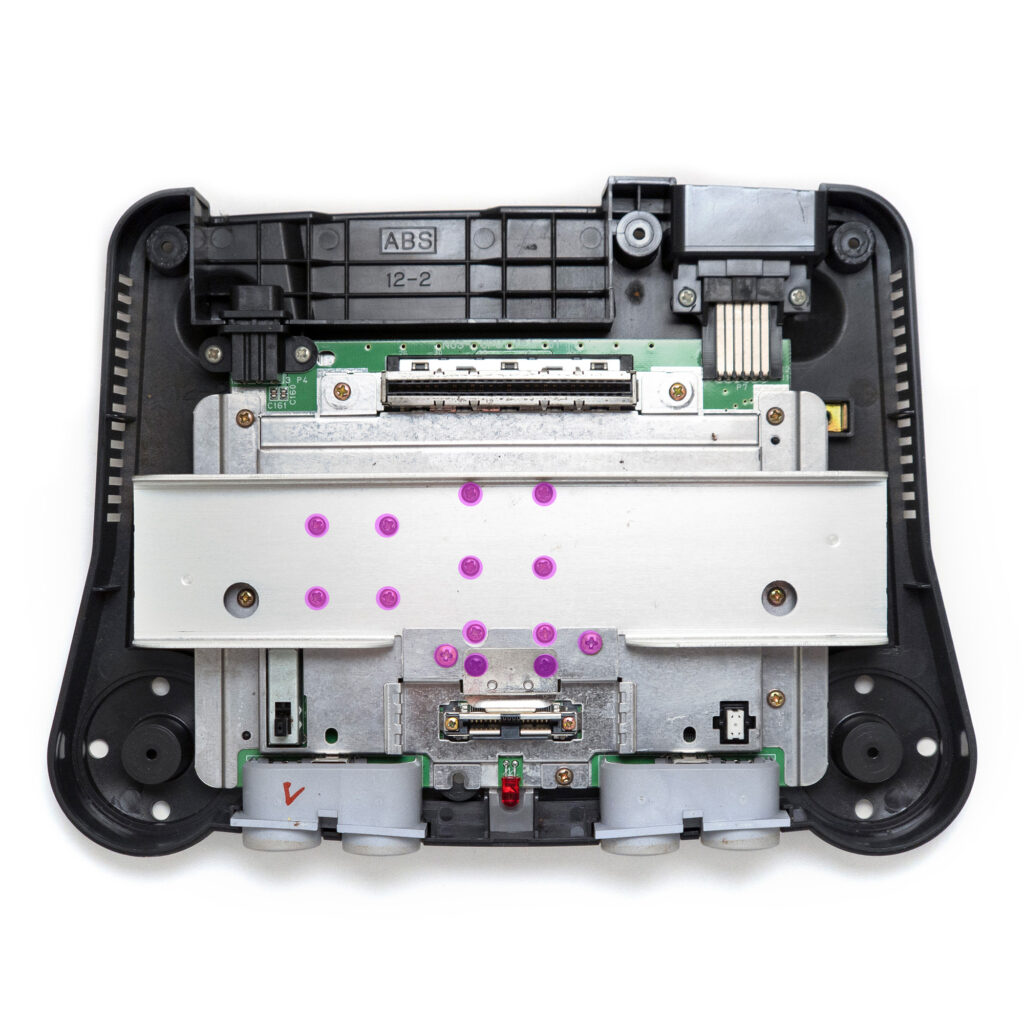
Once you’ve removed those screws, slide the heat spreader bar up and out of the way.
Shielding
Now that you have revealed the main shield and heatsink, there are just 11 more screws to find and remove. There are six all around the edge of the shield, and the two straddling the cart connector at the top are very long – use the large Phillips head for these. The two straddling the expansion port connector at the bottom are very small, so use the fine tip screwdriver for these two.
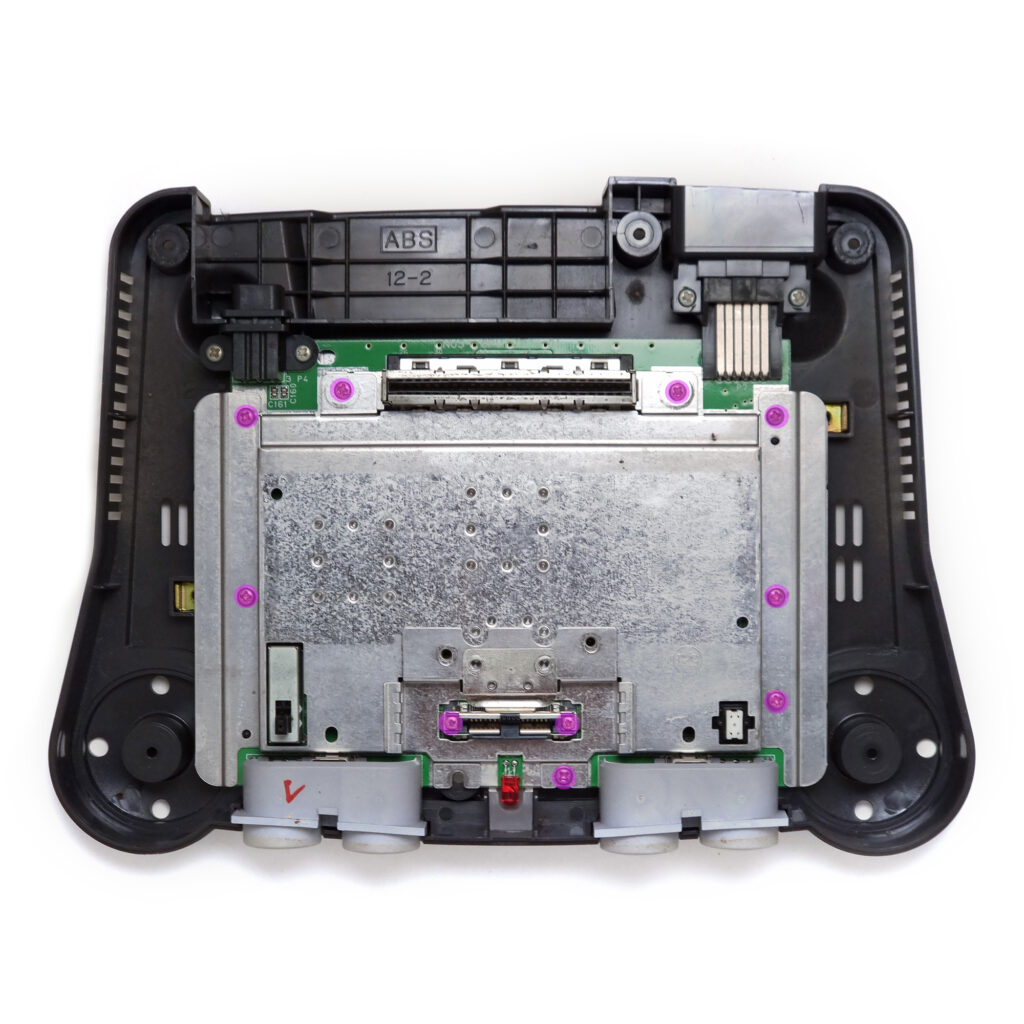
Now, carefully lift the shield and then the mainboard should now be revealed. What a sight. Beautiful!
Mainboard
As this mainboard uses entirely SMD capacitors, you do not need to remove the mainboard from the case in order to change out these capacitors, and in fact we recommend you don’t as it can be a bit finnicky to get back in.
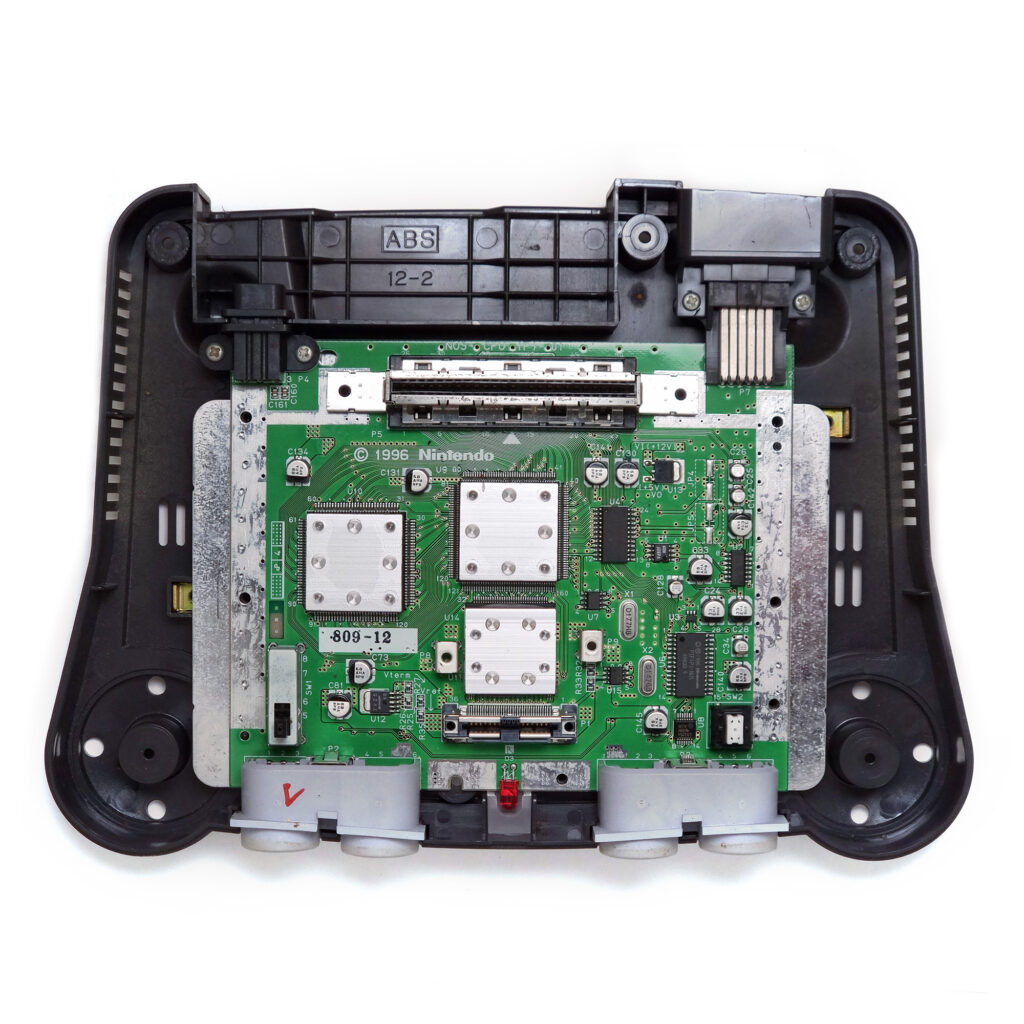
There isn’t really much more to this guide, at this point you can begin removing the existing capacitors and replacing them with new parts. We recommend removing one capacitor at a time as carefully as you can, and replace it, then mark it with a coloured marker to keep track (we use green!)
If you need help identifying which capacitor is which, we recommend checking out our board map, which can be found at https://boardmaps.silvestron.com/nintendo-64/NUS-CPU-01 – this has an interactive list of all the capacitors, their sizes and easy to identify locations all mapped out, like some kind of familiar map thing.
Once you’re complete with the recap, the reassembly steps are the same as disassembly but backwards, so start reading upwards on this page from here!